Before You Begin
Before you begin an AWS security assessment, you need to gain access to the customers AWS account and the best way to do that is by setting up a cross-account trust. Cross-account trusts use a role to delegate access to resources that are in different AWS accounts, which means you don't need to create individual IAM users in each account. The beauty of doing this is its secure, and also easy for the customer to deploy. At a high level this post will walk you through creating a CloudFormation template that gets deployed to the customer account, and then we'll switch roles to access the account.
CloudFormation
Start by using the following CloudFormation template which is written in YAML. This template uses two AWS inline policies, SecurityAudit & ViewOnlyAccess which are read-only.
AWSTemplateFormatVersion: '2010-09-09'
Description: 'This CloudFormation template provides the ability to perform a security assessment on this account.  An IAM role is created to provide view-only access of the metadata in the account.'
Resources:
  SecurityConsultantRole:
    Type: AWS::IAM::Role
    Properties:
      AssumeRolePolicyDocument:
        Version: '2012-10-17'
        Statement:
          - Effect: Allow
            Principal:
              AWS: arn:aws:iam::<YOUR ACCOUNT ID>:root
            Action: 'sts:AssumeRole'
            Condition:
              Bool:
                'aws:MultiFactorAuthPresent': true
      ManagedPolicyArns:
        - 'arn:aws:iam::aws:policy/SecurityAudit'
        - 'arn:aws:iam::aws:policy/job-function/ViewOnlyAccess'
      RoleName: SecConsultantAudit
S3
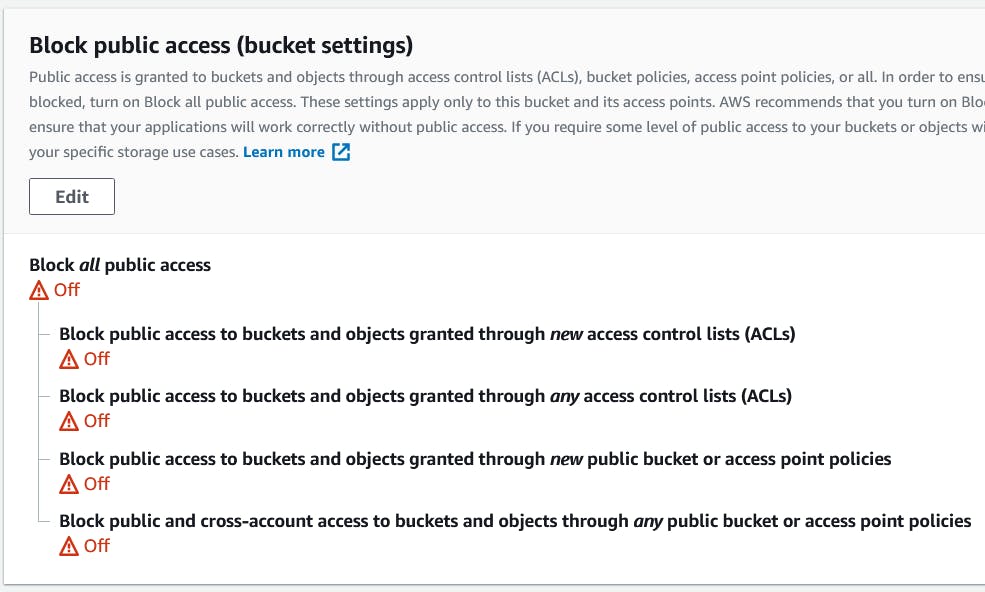
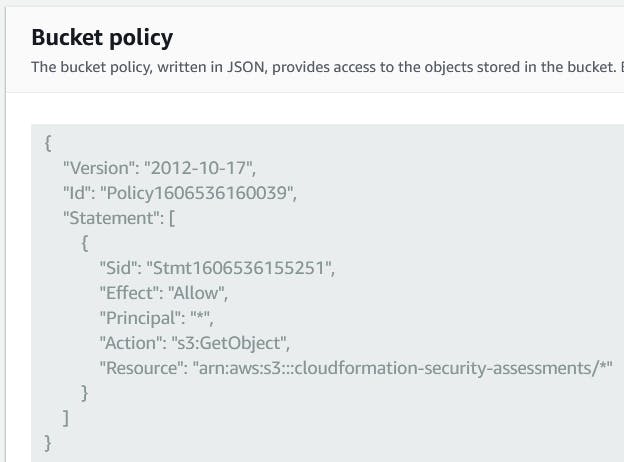
Save your template to an S3 bucket, turn off Block Public Access, and create a bucket policy that allows GetObject access from All.
CloudFormation Quick-Create Link
Our goal is to make this easy for the customer and remove as many steps as possible. To assist with this we'll use a quick-create link to get the stack up and running from the AWS CloudFormation console in a couple of steps. The link can take the following parameters.
https://eu-central-1.console.aws.amazon.com/cloudformation/home?region=eu-central-1#/stacks/create/review
?templateURL=https://s3.eu-central-1.amazonaws.com/cloudformation-templates-eu-central-1/WordPress_Single_Instance.template
&stackName=MyWPBlog
¶m_DBName=mywpblog
¶m_InstanceType=t2.medium
¶m_KeyName=MyKeyPair
Based on my selected parameters my completed link looks like this.
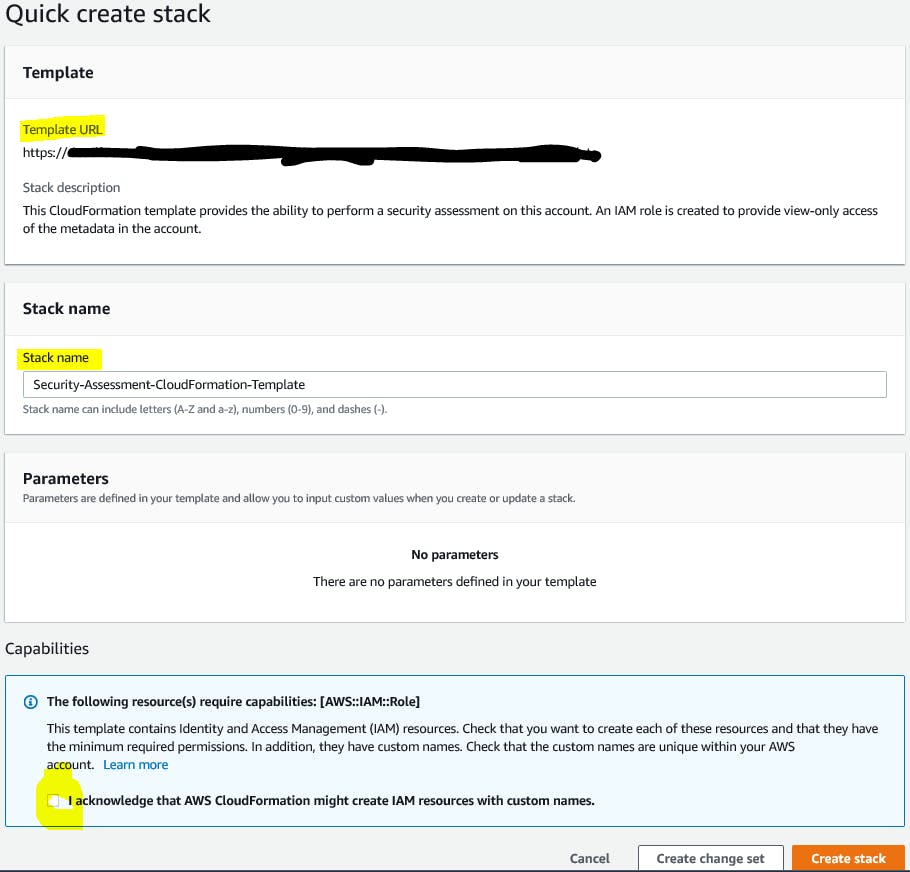
https://us-east-1.console.aws.amazon.com/cloudformation/home?region=us-east-1#/stacks/create/review?templateURL=https://<MY-BUCKET>.s3.amazonaws.com/my-security.template&stackName=Security-Assessment-CloudFormation-Template
You can include some instructions for the end user, but as long as they are signed into their account and click on the link they should be prompted with this window. The Template URL and Stack Name will be filled in automatically. All they need to do is check the box to acknowledge that AWS CloudFormation might create IAM resources with custom names.
Cross-Account Trust
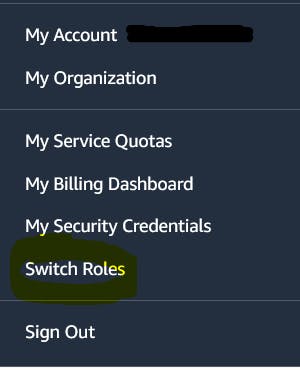
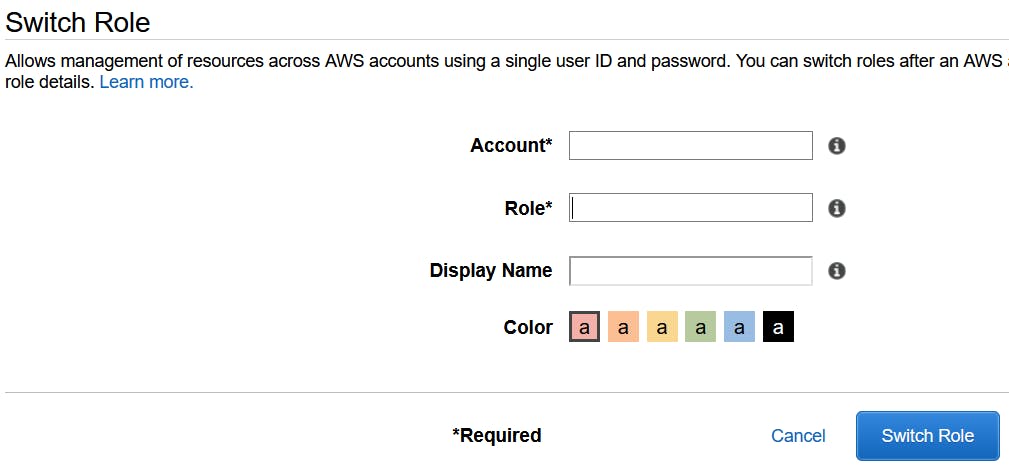
To access the customer account you just need their 12-digit AWS Account ID. Then from the main Navigation menu click on Switch Roles and enter in the corresponding info on the following screen where the Account is the customer 12-digit AWS Account ID, and the Role is the name you defined in the CloudFormation template.
Touchdown
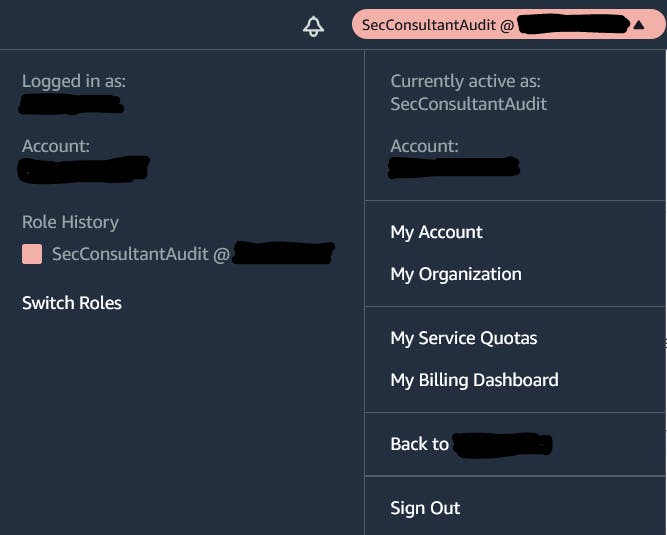
And just like that you should now have access to the customer account via the main navigation menu.
Bonus Points
Having console access is good, but the real power in performing a security assessment comes from being able to use the AWS CLI. We're requiring the use of MFA via our CloudFormation template, so let's see how that works. To start you need your MFA arn.

Run the sts get-session-token AWS CLI command, replacing the variables with information from your account, resources, and MFA device. The default time is 12-hours but I increase it to the max of 129600 seconds or 36 hours.
aws sts get-session-token --duration 129600 --serial-number [mfa-ARN] --token-code [mfa-token]
You'll receive an output with temporary credentials and an expiration time.
{
    "Credentials": {
        "SecretAccessKey": "secret-access-key",
        "SessionToken": "temporary-session-token",
        "Expiration": "expiration-date-time",
        "AccessKeyId": "access-key-id"
    }
}
Export their values to environment variables.
export AWS_ACCESS_KEY_ID=example-access-key-as-in-previous-output
export AWS_SECRET_ACCESS_KEY=example-secret-access-key-as-in-previous-output
export AWS_SESSION_TOKEN=example-session-token-as-in-previous-output
Switch Roles
Begin the process of switching Roles to the customer account by entering the following.
aws sts assume-role --role-arn "arn:aws:iam::99999999999:role/<ROLE-NAME>" --role-session-name "Security-Audit"
You should see the following output.
{
"Credentials": {
"AccessKeyId": "key",
"SecretAccessKey": "secret-key",
"SessionToken": "session token"
"Expiration": "2020-11-28T14:32:23+00:00"
},
"AssumedRoleUser": {
"AssumedRoleId": "999999999999:Security-Audit",
"Arn": "arn:aws:sts::999999999999:assumed-role/SecConsultantAudit/Security-Audit"
}
}
The last step is to configure the AWS CLI environment to use these parameters in subsequent calls. Similar to before just export their values to environment variables.
export AWS_ACCESS_KEY_ID=example-access-key-as-in-previous-output
export AWS_SECRET_ACCESS_KEY=example-secret-access-key-as-in-previous-output
export AWS_SESSION_TOKEN=example-session-token-as-in-previous-output
And that's it. If everything worked as planned you should be able to do a quick check by issuing something simple like 'aws s3 ls' to verify that you're logged into the customers account.
Final Thoughts
Security is the name of the game and as a best practice you shouldn't openly share your AWS Account ID. But in order for any of this to work you have to do the exact opposite and share your AWS Account ID via your CloudFormation template. It's for that reason that I choose to make a separate AWS account which is purely dedicated to security assessments and nothing else.

