Cloud Resume Challenge - Part 2: S3, CloudFront, & Route53

The Nuts and Bolts
Now that we have the basics of the Cloud Resume Challenge out of the way, let's get down to business. In Part 2 of my journey I'll be covering the first 7 steps of the challenge.
Certification - Your resume needs to have at minimum the AWS Cloud Practitioner certification on it.
HTML - Your resume needs to be written in HTML. Not a Word doc, not a PDF.
CSS - Your resume needs to be styled with CSS.
Static S3 Website - Your HTML resume should be deployed online as an Amazon S3 static website.
HTTPS - The S3 website URL should use HTTPS for security. You will need to use Amazon CloudFront to help with this.
DNS - Need a custom DNS domain name to the CloudFront distribution, so your resume can be accessed at something like my-c00l-resume-website.com. You can use Amazon Route53.
Javascript - Your resume webpage should include a visitor counter that displays how many people have accessed the site.
I already had my AWS Certified Solutions Architect - Associate certification so that one was easy. Next I had to build my resume. I can certainly mess around in HTML and CSS, but I'm no Web Developer so I did the most sensible thing and started hunting for a nice template. There are a lot of great free options out there but ultimately I decided on this one - https://startbootstrap.com/theme/resume.
Static S3 Website
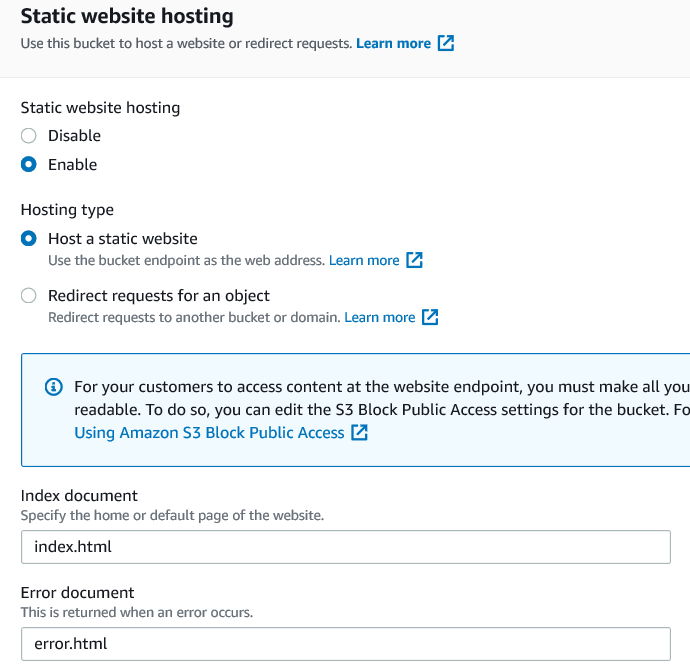
To begin hosting a static S3 website, we need to start by enabling Static Website Hosting which can be found in the Properties Section of your bucket. Enable Hosting for a Static website and then select names for your Index and Error documents respectively.
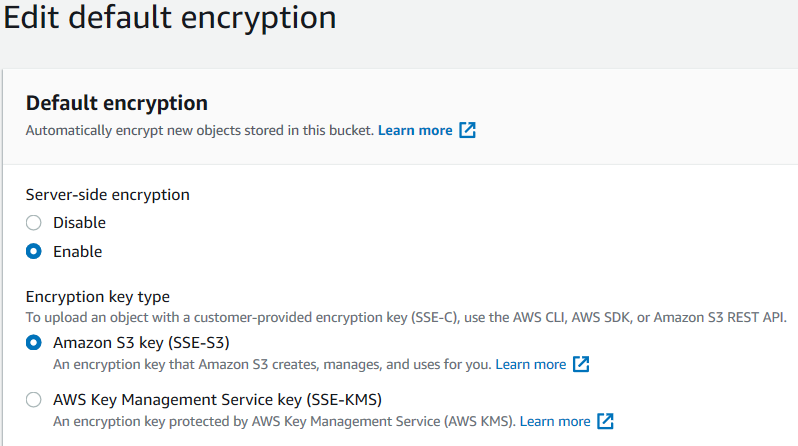
I enabled Encryption which is also found in the bucket Properties section. Technically you don't need to and its certainly not a requirement for hosting a basic website like this, but it felt right. :)
Bucket Access & Bucket Policies
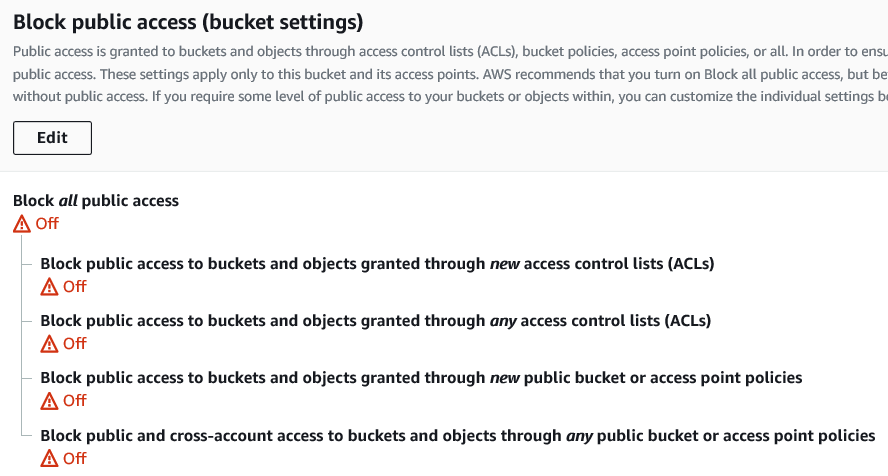
In order for people to be able to access your new website, you need to allow public access to your bucket so make sure you turn off Block All Public Access.
Next update your Bucket Policy. You can write this from scratch if you know how, but if not the AWS Policy Editor is a great JSON editing tool for this. Essentially you want to start by Allowing everyone access to GetObject from your S3 Bucket which should look something like this.
{
  "Id": "Policy############",
  "Version": "2012-10-17",
  "Statement": [
    {
      "Sid": "Stmt#############",
      "Action": [
    "s3:GetObject"
      ],
      "Effect": "Allow",
      "Resource": "arn:aws:s3:::bucket-name/*",
      "Principal": "*"
    }
  ]
}
CloudFront Distribution
CloudFront is a CDN (Content Delivery Network) that retrieves data from Amazon S3 buckets and distributes it to multiple datacenter edge locations. The nearest edge location is routed when the user requests for data, resulting in lowest latency, low network traffic, fast access to data, etc.
Create a New Distribution
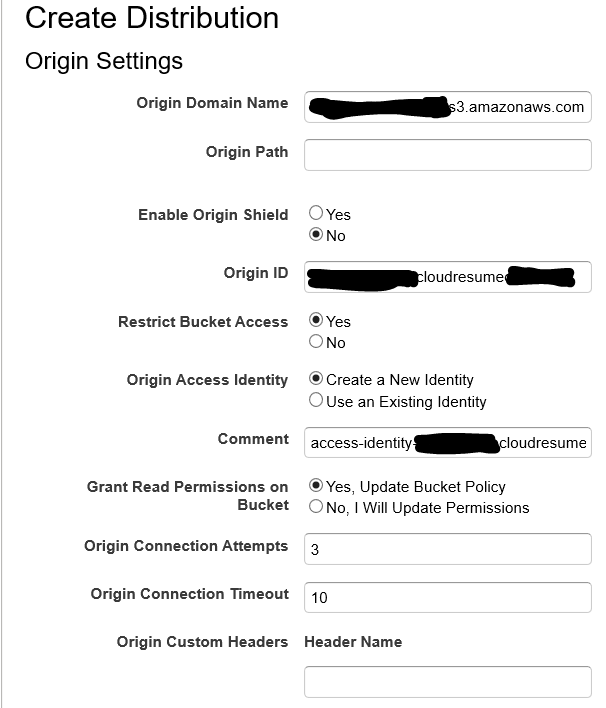
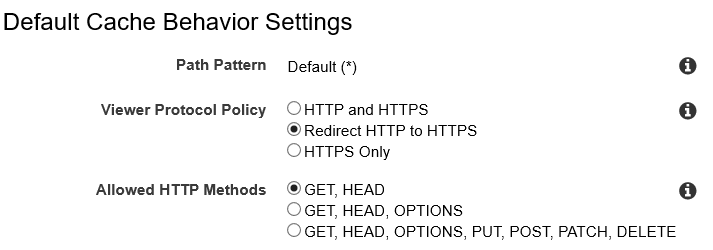
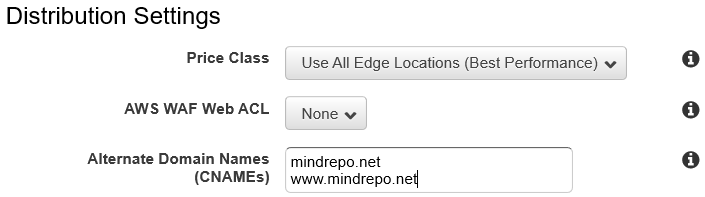
There's a few options when creating a new CloudFront distribution, but you'll need to restrict bucket access and create a new OAI (Origin Access Identity), make sure to Redirect HTTP to HTTPS, and finally add your Alternate Domain Names (CNAMES).
CloudFront So Far
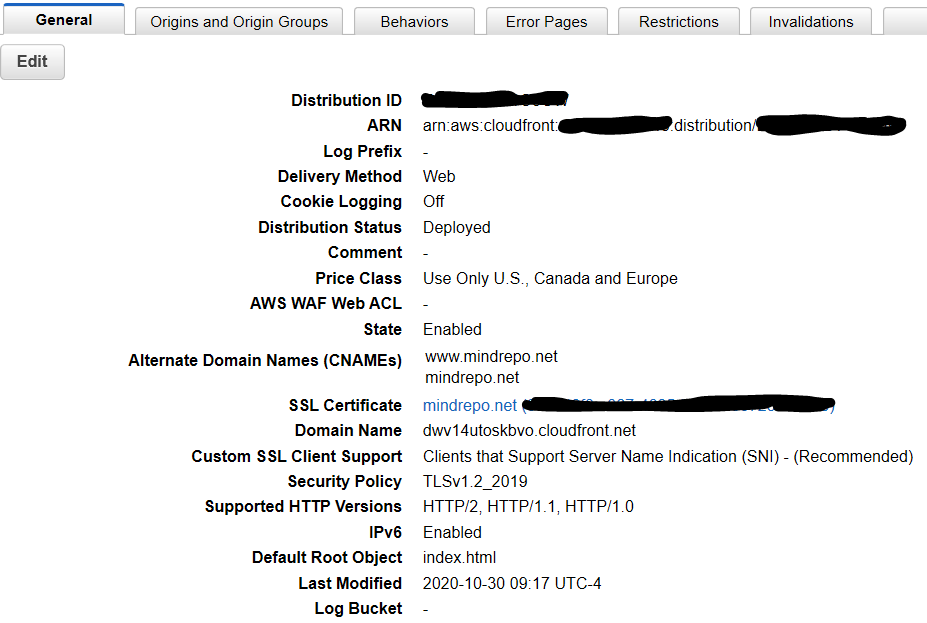
When its completed it should look something like this. You'll notice there's an SSL certificate linked there, but we didn't create that yet. It's OK, we'll do that part later.
S3 & CloudFront Origin Access Identity
The OAI that was created for us in the distribution will automatically update our S3 Bucket policy to permit access to CloudFront. For security purposes we now want to make sure that our S3 bucket can only be accessed directly from CloudFront. To do that we'll need to update our bucket policy to remove the Allow all GetObject access from Everyone, and only leave the newly created OAI section as follows.
{
    "Version": "2012-10-17",
    "Id": "Policy############",
    "Statement": [
    {
        "Sid": "2",
        "Effect": "Allow",
        "Principal": {
        "AWS": "arn:aws:iam::cloudfront:user/CloudFront Origin Access Identity ############"
        },
        "Action": "s3:GetObject",
        "Resource": "arn:aws:s3:::bucket-name/*"
    }
    ]
}
Progress
If everything is working as planned up to this point you should be able to access your website directly from your CloudFront link, but no longer should be able to access it from your S3 public link.
AWS Certificate Manager
Open up the AWS Certificate Manager and create a new Public Certificate for both Domain Names that you entered in CloudFront. Certificate Manager will require you to validate the certificate by creating an entry for it in Route53. This process will automatically create the CNAME from your Certificate in Route53.

CloudFront Cleanup
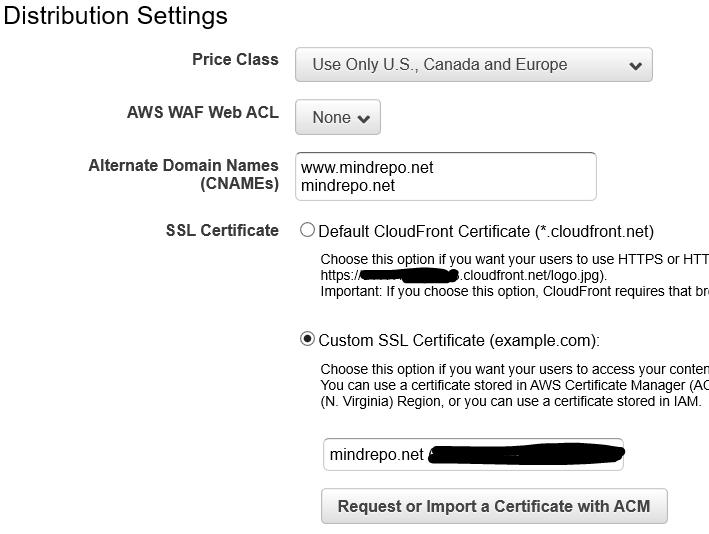
Now that our Certificate is created, we can head back to CloudFront and finish setting up that part. Edit the CloudFront Distribution settings and choose Custom SSL to link it to your SSL Certificate.
Route53
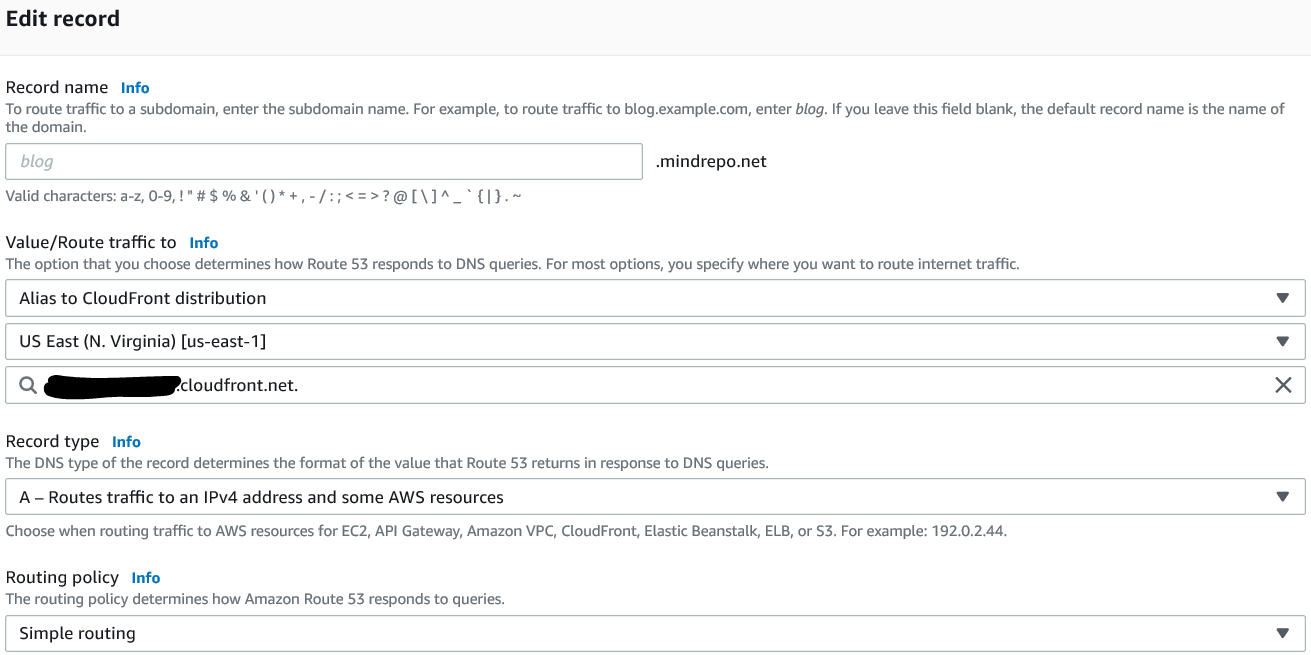
Finally you need to add two A Records in Route53. One for www.mydomain.net and one for mydomain.net to point to your CloudFront Distribution URL like this.
Part 2 Complete
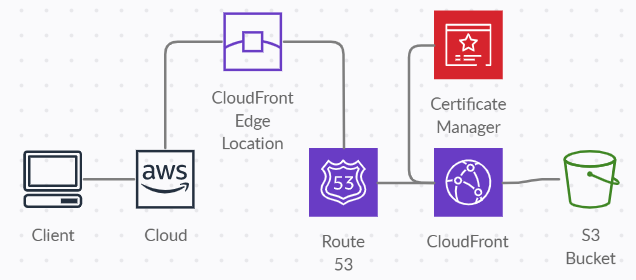
And just like that our new website is up and running. We should now be successfully hosting our website over Route53, with CloudFront, an S3 Static Website, and a little help from AWS Certificate Manager.
My Journey
This will be a multi-part post detailing my journey towards completing the Cloud Resume Challenge.
My Cloud Resume Challenge URL - mindrepo.net
Cloud Resume Challenge - Part 1: The Challenge Explained
Cloud Resume Challenge - Part 2: S3, CloudFront, & Route53
Cloud Resume Challenge - Part 3: Lambda, DynamoDB, & API Gateway
Cloud Resume Challenge - Part 4: SAM (Serverless Application Model
Comments
Join the discussionNo comments yet. Be the first to comment.


